


I LOVE not having to have every brush, scraper, and scrubbing pad sitting out next to my kitchen sink. Installation requires you work at some weird angles in a fairly confined space, so it's a little challenging, and the hinges they come with tend to make it close kinda harshly of you bump them closed. I do have a couple tips if anyone's interested. First, it's very helpful to have some kind of handle or knob on the front when you're done, but it's best installed at the very end just before you put the bucket on. Also, installing the buckets as far down the drawer front as you can help to reduce stuff jumping out of the buckets if the fronts snap closed on you. And finally, some thick cabinet bumpers or felt pads help too, both with snapping shut too hard and allowing some air to circulate around any items that aren't quite completely dry when you put them in.
I spent the 1st half hour, (which is the estimated assembly time), blow drying and scotch taping my template back together since the dog found it before I did when I opened the box. You'll definitely want to pre-drill all holes like the instructions recommend. If you have hardwood cabinet frames like maple or oak you should also drive screws all the way in and back them out BEFORE you actually mount the panel. This will make the assembly a lot easier later on. Also make sure your hinges are screwed tight to the drawer front and the screws that hold the trays are adjusted properly before final mounting. This will help to minimize the amount of times you'll have to remove and re-install this thing. Anyway after I had mine installed, I read in the questions or somewhere that there's a different set of hinges for panels that are 16" or longer, Rev-A-Shelf Seriesone hinges 6552-95-0220-6552. That's good to know. LOL. They look to me like they just have a fatter spring on them so maybe I'll just swap the springs. Conclusion: I bought the wrong kit for my 34" panel because i didn't know there were so many different options but It's hidden so who cares.
Work great! I love having the little trays to hide my sponges and scrubbies away off of the sink. Pluses: Excellent little template design and good directions for installation, and the hinges are designed in a way that you can adjust them to make certain alignment of the drawer fronts is spot-on.
Four stars due to the amount of a learning curve necessary to accomplish the task of installation. Because we were doing a DYI refacing of our cabinets, I had already removed the drawer fronts. In order to align the hinges correctly, you have to draw an exact outline of the cabinet opening on the back of the drawerfronts- so I had to align the drawer fronts precisely, hold them on with one hand, and outline with the other all in the cramped space between the sink and the cabinet fronts. No easy trick. If you mess that part up, the drawers are not going to align correctly. That lack of room also caused some difficulty in getting the hinges snugly screwed into place, and I ended up stripping out some screws. (the package comes with a few extra, whew!). That was admittedly partially my fault, as I used the next size smaller drill bit when pre-drilling (I didn't think it mattered, but it DOES!). Pre-drilling is a MUST (both so you don't ruin your cabinet facings, and for ease of attaching the hinges with screws) and if I'd used the correct size drill bit to start with, the lack of room for screwing the hinges into the cabinet would have been less annoying. I had to call in my son to give me a third hand, as holding the hinges in the exact correct place while screwing them into the cabinet proved impossible for just two hands. The combination of holding the hinges open and keeping them correctly aligned, and screwing them into the cabinet was the most frustrating part, especially on the right side, as it was even more awkward. Having a helper on hand is a great idea for that piece. It will save you a lot of swearing.
That said, I love them - I hate clutter, but like my scrubbies, so this was a great addition to my "new" kitchen.
Pros:
* Instructions are very clear save for installation time of ~30 minutes. To do it well it takes a bit over an hour for each shelf drawer. Staples, staples, and more staples on this cabinet to remove first.
* Strong screws... I'm happy to report that none were broken on installation.
* Just like the one at a good friends house that he's had for over a decade.
* Closes well and stays closed.
* Great for cleaning up the clutter around the sink.
* Found on Amazon and all local home improvement shops in my state were clueless.
Cons:
* Bottom lip closest to the sink could be just a tiny bit taller/wider as my second scrub brush likes to fling itself into the cabinet if I don't control the "snap" close.
Consumer tips:
* Door should "snap" shut (with the spring) and not have to be pushed. If this is happening the hinges are too close together and may need base screw adjustments on the extension to the cabinet face.
* Short stubby Phillips screwdriver was needed for on the cabinet adjustments to the screws (see prior bullet point)
* Used one size down from the recommended drill bit size for longer longevity of the cabinets... predrilling is a must and a little elbow grease.
* Read the quantities in the description carefully... ended up ordering two thinking that is what I needed but got a total of four trays and eight hinges... ah well will have an extra set if I ever move.
* Recommend buying some knobs if they aren't already there.
* Measure, measure, measure!
Installing these trays was faster and easier than the reviews had led me to expect. In deference to those who had a tough time, I will concede that the directions were not as clear as they might have been. The pictures helped, but there was one point at which the instructions were dead wrong, and if not for a bit of text over the picture I am sure I would have screwed up on that step. So make sure you have a clear understanding of what you are about to do before actually doing it.
Tips - even if you are a "fly by the seat of your pants" type who has never read all the way through a set of instructions before beginning or drilled a pilot hole, DO IT NOW. I took the additional step of "test-fitting" each of my screws in the newly-drilled holes - I drove the screws in about 3/4 of the way and then removed them and set them aside - and I'm glad I did. That way I could hand tighten the screws by a couple of turns as I set them in place. And don't bother with your cordless screwdriver - you'll never get it into the tight spaces you'll be working in. I used a long, thin screwdriver, but a short, stubby one might work just as well.
I found that a yardstick worked better than a measuring tape. The yardstick gave me the straight edge I needed for making my marks. And because the screws for my cabinet knobs are rounded and do not sit flush with the back of the drawer, I had to recess them so the trays could lay flat against the drawer front. You can do this by removing the knobs and using a drill bit the same diameter (or slightly larger) as the screw head, drill a little well for the head to sit in. Do not over-drill - I learned this one the hard way - only go down as far as you need to, just the depth of your screw head. This is because most knobs have both a maximum and a minimum depth - usually somewhere between 3/4" and 1", so if you recess your screws too far, you may need to shim them back out with washers to make sure your knobs will tighten properly.
If you are installing these trays in new cabinets, make sure you check the alignment of the sink base false front with the adjacent drawers. I didn't, and the false front now sits about 1/4" higher than the drawer next to it. I'm not sure if this was a preexisting issue or if I somehow realigned the false front while installing the trays, but in either case it will have to be addressed. I am going to raise the facing of the other drawer because that will be easier than redoing the sink base trays.
As you can see from the foregoing, I am hardly a skilled carpenter. I made a lot of mistakes. Nevertheless, the job took me about half and hour, start to finish, and that includes the time I spent adjusting my knobs.

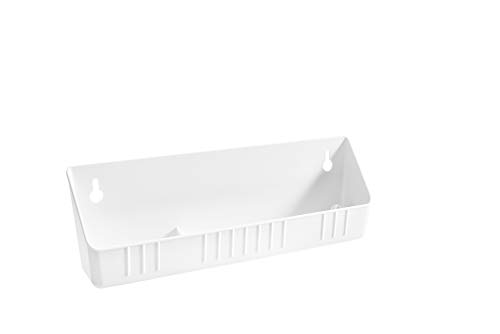
Feature Product
- Package Contents: (2) White open tray, (2) pair of hinges and mounting hardware.
- Assembled dimensions: 11 inch W x 2.125 inch D x 3.813 inch H.
- Perfect for kitchen or bathroom installations.
- 2 and 1/8 inch deep
Description
Rev-A-Shelf’s most popular Sink Front Tip-Out Tray Set, the 6572 Series includes one conventional open tray, one accessory tray with ring holder and soap dish, and 2 pairs of Self-Holding hinges. The 6572 Series is made of high-impact polystyrene and is available in 11" or 14" sizes.
I am reasonably handy but spent several hours installing the first one. Quicker on the second one. Both fit very well, and after a little adjustment of screws open and close smoothly and you cannot tell from positioning of the false cabinet fronts that anything has changed. Be aware that there isn't much room for storing in the bins, but still a good thing to have if you need to replace a broken false front cabinet latch or are starting from scratch on new cabinets.
Noting some others found the screws to be "cheap" and easily damaged, I did not have such a problem.
Overall very good so far. Installation was a bit of a pain because the instructions are slightly vague at step 5. They say to turn the template sideways and mark mounting holes for the tray, but they don’t clearly show where you put the template after you turn it sideways. In the end, it doesn’t matter. As long as you mount the tray somewhere in the middle and the drawer closes, you’re good. Getting the tray screwed down is gonna require something that turns screws at a 90 degree angle. I used a small ratchet and a screwdriver tip. Even my stubbiest stubby screwdriver was too long to fit in there with the drawer open.
Once it was installed though, it worked well. The screws and hardware seem very well made. I used my drill to get the side screws in and even though I slipped, it didn’t strip the screw which was nice.
A little added space! This is a nice little addition to kitchen, i added the slow close hinges to it. I put the tool for my garbage disposal in there as well good place to keep and know where it is. I added pictures to try to give ideal of what it can hold.
I bought this to use in our 30" sink base cabinet. I only used one set of hinges and installed them next to each other. The templates worked well except for the one for where to put the screws to actually hang the bins - they ended up sitting too low by almost a half inch. They worked great until we put the new sink in though; it was too deep (from front to back of our counter, plus it is a 9" deep sink) and it didn't leave enough clearance. I used some Command toggle hooks (.5 lbs) on the cabinet doors and hung them that way. I'm saving the hinges for the next house though!
Love this! No more clutter of sponges and stoppers around the sink. We installed these when swapping out the sink. Installation with no sink in place is a breeze; otherwise I can see how it might be tricky. The hinges work well. They were a little stiff at first but loosened up in a day or two. They still close with a little "snap" which one time jettisoned the sponge into the undersink cabinet ... now I know where to look if it ever goes missing again. The trays can be slid off their mounting screws and rinsed out when they get a little dirty from storing the cleaning supplies.
0 comments:
Post a Comment